Managing members
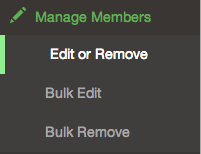
To view your current members and manage their accounts, click on the “Manage Members” tab.

Managing a single member
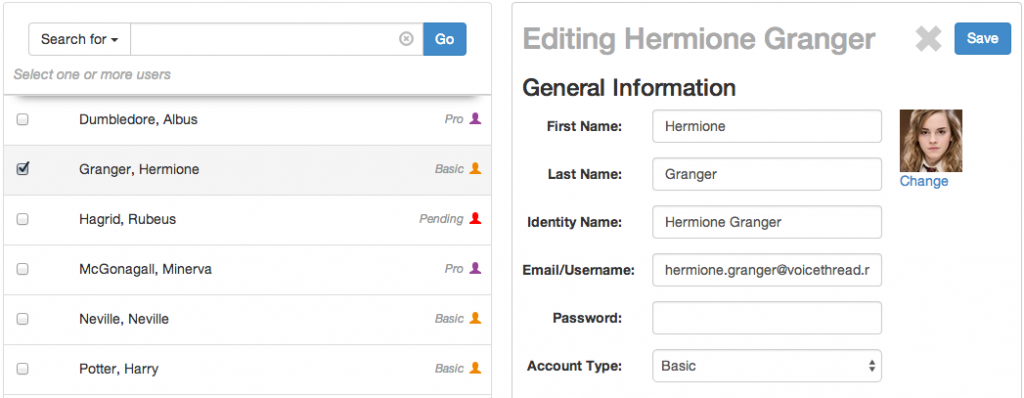
When you first click on the “Manage Members” tab, you’ll automatically see the page that allows you to manage members individually. To view and edit details on a student’s account or allot export credits:
- Click on a person’s name.
- Edit any of the information that needs to be changed.
- Click “Save”.

You can also update more than one student at once by clicking the checkboxes next to multiple names. Any information that can be edited for all students at once will be displayed on the right.
Searching for specific people
At the top of your list of members, there is a search bar. Enter a person’s name, email address, graduation year, or label and click “Go” to find people who match that search.
To perform a more advanced search, click on the button that says “Search for”. This allows you to narrow your search by more specific parameters like account type and information type, and you can sort your results by several criteria. Once you’ve selected your advanced parameters, enter your search terms and click “Go”.

To close a search, click the “x” on the right side of the search bar.
Tip: To see all members of a specific account type, select that account type in the “Search for” menu, and click “Go” without entering any search terms.
Managing members in bulk
If you need to update the first names, last names, Identities, passwords, or labels for many people at once, you can do so by creating and uploading a CSV file that contains all of your changes. This is a much faster way to perform large-scale updates.
After clicking on the “Manage Members” tab, select “Bulk Edit” on the left. On this page, you’ll be able to download a sample CSV file. Open this file, enter the email addresses or usernames for the students whose information you need to change, and then enter the information that needs to be changed for each person. Any items left blank will be skipped, so you only need to enter information that is truly changing.
Creating a CSV file
The sample CSV file available for download in the Manager already has the column headings in place, along with some sample information.

email
Enter the user’s full, valid email address.
first_name
Enter the person’s real first name. This information is only visible to Administrators, so it’s important to enter the correct information.
last_name
Enter the person’s real last name. This information is only visible to Administrators, so it’s important to enter the correct information.
identity
An Identity is the public name that appears next to the image that represents a user whenever he or she makes a comment. This name will be visible to anyone who can view a VoiceThread on which the user commented.
password
The password needs to be at least 7 alphanumeric characters. Passwords are case-sensitive.
label (optional)
The label will be attached to a user’s account and can be used with the search/filter functions in the Overview area to find all people who share a label. You can then perform bulk actions such as adding them to a Group, removing them, or allocating resources like export credits and phone minutes. If you do use the label field, make sure your labels are unique. The more information you include, the more useful labels will be.
Uploading a CSV file
Once you’ve created and saved your CSV file:
- Return to the “Bulk Edit” page.
- Click the blue “Upload” button, and select your CSV file.
- Your updates will be listed on the page, and any errors will appear in red so you can correct them. Click on any information to make corrections if necessary. You can also click on the “x” at the far right side of any row to omit that member from your updates.
- If you want to require your members to change their passwords to something new the first time they sign into their accounts, check the box that says “Require users to change password?” at the top of the list of information.

- Click “Submit”.
- Save your CSV file for your records. New passwords will not be visible again after this point.
Promoting a Pro user to Administrator
You may have as many Administrators for your Organization as you would like. To promote another Pro member to Administrator, follow the steps below.
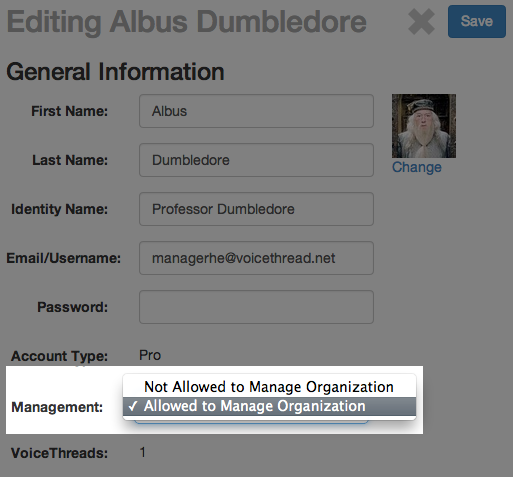
- Go to the Manage Members tab.
- Click on the name of a Pro member.
- In the Management field, select “Allowed to Manage Organization”.
- Click the blue “Save” button.
